
This article is an excerpt from the Shortform book guide to "Sprint" by Jake Knapp, John Zeratsky, and Braden Kowitz. Shortform has the world's best summaries and analyses of books you should be reading.
Like this article? Sign up for a free trial here.
Why are prototype storyboards helpful for the design process? How do you make one for a design sprint workshop?
Jake Knapp’s five-day Design Sprint method is an efficient way to design and test a product prototype in a team. According to him, storyboarding a prototype benefits the design process and is a crucial step to take towards the end of your sprint workshop.
Read on to learn why and how to make a prototype storyboard, according to Knapp’s Design Sprint method.
Why Storyboard a Prototype?
Storyboards have a long history of use in visual storytelling, from comics and graphic novels to television and film. According to Sprint authors Jake Knapp, John Zeratsky, and Brian Kowitz, storyboards can also be effective product design tools. Here are three benefits of using prototype storyboards in the design process.
- Because of its narrative nature, storyboarding connects your design to its real-world context, including the people who will use it and the setting where it’ll be used. This keeps the product connected to the customer’s needs and interests.
- Storyboarding allows you to create a visual representation of your product, which is more effective than other forms of description. Images clearly communicate how the product works to people of different backgrounds and knowledge levels.
- Storyboarding forces you to consider the sequence and flow of the customer’s experience using your product, keeping you aware of the bigger picture as you design each element.
Marty Cagan’s Four Kinds of Prototypes
Other creators of product development processes agree that you shouldn’t waste time trying to build a complete product in the prototyping phase. In his “product discovery process” for tech entrepreneurs, Marty Cagan discusses four types of prototypes you can create depending on the needs of your project.
- A prototype that provides live user data. This is a functional prototype that customers can test, so you can collect data on their experience. It’s a less sophisticated version of your product, and it’s good for testing high-risk ideas. This type of prototype is great for a sprint.
- A prototype that appears to function automatically, but actually requires manual operation. In this case, an engineer performs functions on the back-end that a product claims to do automatically, giving the customer the illusion of function without having to spend time building complicated automated features. You can also build this type of prototype in your sprint.
- A prototype that shows whether your product idea is feasible. This is especially relevant to engineers working on tech products who aren’t sure whether they can write the code for their product idea. They can figure out whether it’s possible by writing just enough code to know they can finish it. This type of prototype is typically created for the benefit of the engineers, so it likely wouldn’t apply to a sprint.
- A prototype that’s a non-functional version of your product. This type is for the product development team only, as it just offers a skeleton version of the product for the team’s visual reference. You need to test the functions of your product with customers during your sprint, so you wouldn’t use this type.
How to Make a Prototype Storyboard
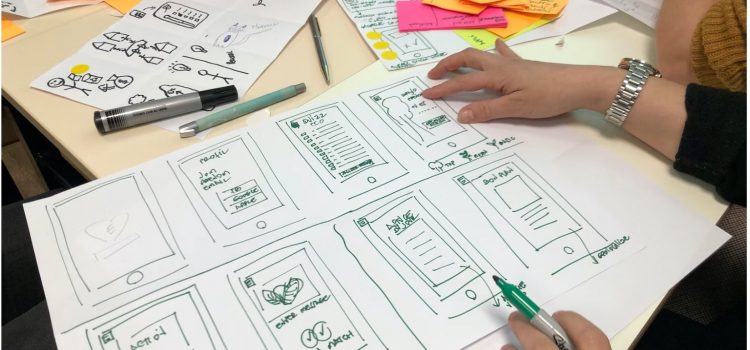
According to Jake Knapp’s Design Sprint method, drawing a more extensive prototype storyboard of your product in use (10 to 15 panels on a whiteboard) should come after your team leader has selected a design, which should take place on day three of your sprint workshop.
Start by drawing the moment and the context in which the customer first engages with the product. For example, the first panel of the bookstore’s storyboard could show a web search for the bookstore’s website.
Fill in the other panels with steps that a customer will have to go through to use your product from start to finish. As the authors say, you’re telling the story of what you want to happen during Friday’s tests with customers. For example, the middle panels of the bookstore’s storyboard might include a drawing of each question prompt the customer will be asked before they receive their recommendations. They’d depict the layout of each screen, the important text involved, any images included, and so on. The last few panels might depict the various recommendations the customer received, showing what the profile for each recommended book would look like.
Creating the Prototype
Now, it’s time to use the storyboard you created to build your prototype.
Use the storyboard as a reminder of the prototype’s components, a guide for its visual design, and a reference for how it’s supposed to function when you test it later in the day. According to Knapp, Zeratsky, and Kowitz, your prototype should be sophisticated enough to create the illusion of a complete product, but not so complicated that you can’t finish it. You can go back and add missing pieces later. For Friday’s testing, all you have to do is create the features that will give you the information you need from the customers.
For example, instead of trying to build a recommendation tool that features every book in their inventory, the bookstore could create a tool that pulls recommendations from a list that has one or two books per genre. The customer would still receive a recommendation based on their choices, but the team wouldn’t have to waste time inputting every title they have in stock.
Choose Your Roles and Start Building
Before you begin building, divide responsibilities for the creation of the prototype. Knapp, Zeratsky, and Kowitz recommend filling the following roles.
- One or two people make the individual components of the prototype. The authors suggest designers and engineers for this role.
(Shortform note: Designers and engineers already have the knowledge to build the pieces of your prototype, whether it involves constructing machinery, writing code, or designing processes. Assigning this role to them will eliminate the time required to get someone else up to speed.)
- One person links the component parts into one cohesive product.
(Shortform note: This role is arguably the most important because it’s the person who allows you to work as a team. Without someone to make sure all the pieces fit together, you’d have to work together on every piece (which would take too long), or you’d have an incomplete, incoherent prototype.)
- One person writes any text necessary for the prototype.
(Shortform note: Written cues often guide the customer through their experience with a product, so they need to be clear. If the text included is confusing or inaccurate, your prototype will look sloppy and incomplete. The more niche your product is, the more experience your writer should have writing within the conventions of your business or industry.)
- One person gathers any media (sounds, images, sample content, and so on) that can be borrowed for your prototype.
(Shortform note: Your company might have a library of content for you to use, but if it doesn’t, there are many websites where you can find fair use materials. For example, you can use a Creative Commons search to find audio and images under fair use, or you can use a Google Advanced Image Search and choose Creative Commons licenses in the usage rights filter.)
- One person writes the customer interview script on Thursday and conducts the interviews on Friday. In order to be as unbiased as possible during the interview process, Friday’s interviewer shouldn’t work on the prototype itself.
(Shortform note: The authors suggest you write a script for your customer interviews. Four to five pages is a good target for a 60-minute interview. Organize your questions to follow the progression of the interview so you aren’t flipping around trying to find the right section when you’re with the customers. That being said, don’t be afraid to deviate from the script if the customers’ observations steer the interviews in a different direction.)
Around 3:00 pm on Thursday, have the person who linked all the pieces of the prototype together present a full run of its use to the team. If any components of the prototype don’t match up with the storyboard, you still have some time to fix them before you go home for the day.
(Shortform note: Make sure to set a hard stopping time for these final fixes to ensure you can get home and have plenty of rest. As we’re about to discuss, the final day of a sprint is intense, with multiple customer interviews to conduct, and you’ll need to be well-rested and energetic to make the best impression on the customer.)

———End of Preview———
Like what you just read? Read the rest of the world's best book summary and analysis of Jake Knapp, John Zeratsky, and Braden Kowitz's "Sprint" at Shortform.
Here's what you'll find in our full Sprint summary:
- How to build and test a prototype in just a five-day work week
- The step-by-step processes for planning and completing a sprint
- How to conduct one-on-one interviews with your customers


